|
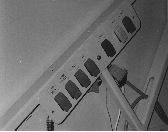
5.9 Screw the undercar safety skirt to the switch activation pins. - Ensure locking washers are used !
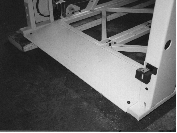
5.10 Raise the cabin up approximately 1 metre and position the underpan on the floor between the guides. Fit the rear angle bracket and guide seals to the underpan. Wire the underpan overide switch mounted on the rear of the underpan with the "coily" cable terminated at the rear of the cabin.
5.11 Lower the cabin so that the floor is approximately 300mm from ground level. Attach the underpan to the floor tensioner cables. Fit cable ties to the underpan lugs to prevent the cables from working loose.
Note: Ensure that the upper surface of the underpan is free from "debris" prior to connecting up tensioner cables as this will affect the sensitive switch settings. - Vacuum if necessary.
5.12 Adjust the four cable length adjusters to level underpan to allow sufficient upward movement for sensors (8-10mm nominal). As a rule of thumb, the side of the underpan, should just cover the pop rivets that fix the lower of the car panels.
|
|


